The Creative Design Cycle guides students through four stages: investigating real problems, generating ideas, planning solutions, and building prototypes. It’s Design Thinking—adapted for the realities of K-12 classrooms.
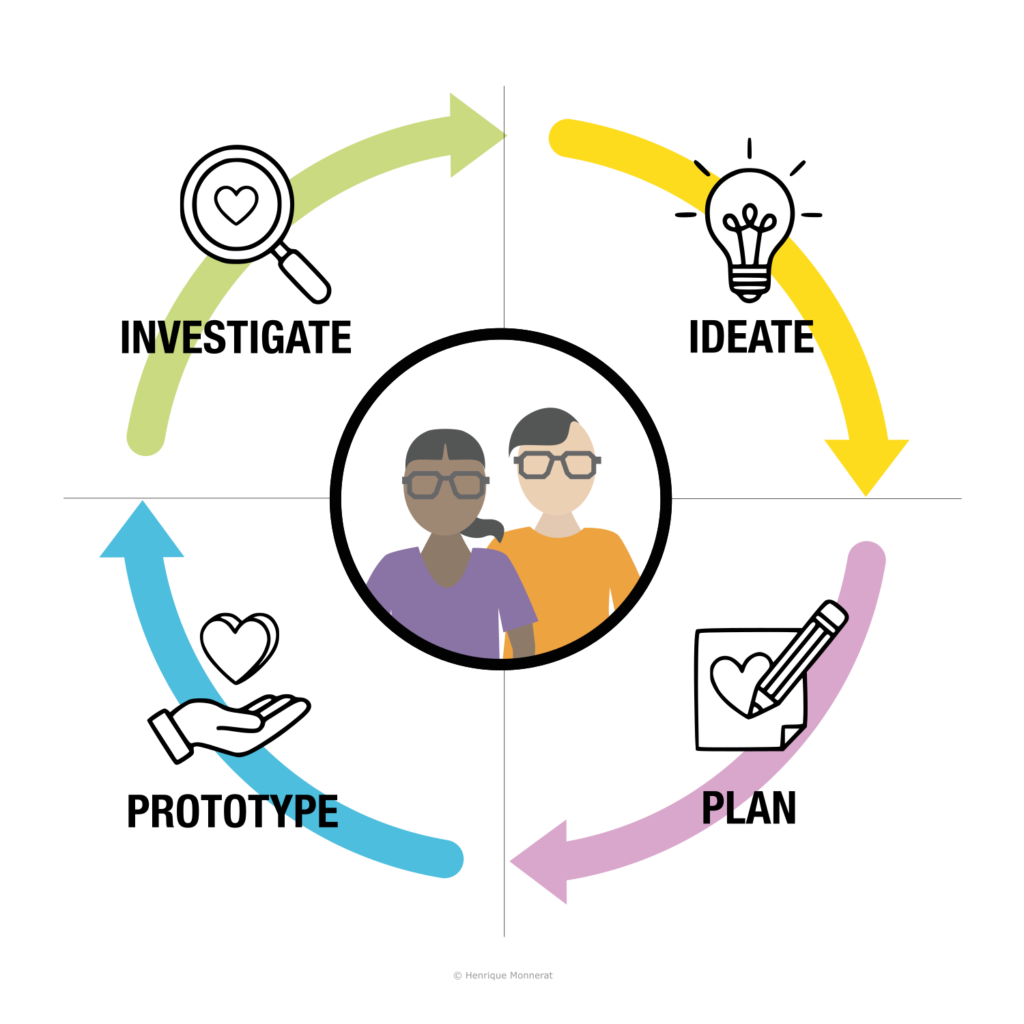
The Four Stages
Each stage of the Creative Design Cycle serves a specific purpose in the creative process. Here’s what happens at each stage and the questions teachers should ask when planning.
Stage 1: Investigate
Students research the problem before attempting to solve it. They cannot create meaningful solutions to problems they don’t understand. Before any ideation happens, students must investigate the context—real people, real places, real stories, real data.
What students do:
- Research the problem or topic
- Interview stakeholders or users (when possible)
- Observe, listen, and gather information
- Analyze existing solutions and their limitations
- Synthesize findings into a clear problem statement
Student outputs: Problem statement (in their own words), stakeholder profiles or empathy maps, key insights from research, “How might we…” questions
Note: In Cycle 2 and beyond, investigation shifts focus. Students may gather user feedback on their prototype, troubleshoot technical challenges, or learn new skills needed for the next phase of the project.
Teacher planning question: “How will my students investigate the problem before I ask them to solve it?”
Stage 2: Ideate
Students generate many possibilities before committing to one. Once students understand the problem, they need space to wonder, question, and imagine. This stage emphasizes divergent thinking—producing quantity before quality, wild ideas before practical ones.
What students do:
- Brainstorm without judgment
- Ask “what if…” and “how might we…” questions
- Sketch ideas visually (not just write them)
- Build on each other’s ideas
- Explore multiple directions, not just the first idea
Student outputs: Multiple ideas (at least 3-5 before selecting)—including wild possibilities, not just safe choices. Visual sketches encouraged. Organized clusters or categories of ideas. A shortlist of promising directions.
Teacher planning question: “Where am I creating space for questions and possibilities, not just answers?”
Stage 3: Plan
Students articulate and justify their solution before building it. This is where CDC diverges from traditional Design Thinking. In professional settings, designers often jump straight from ideation to prototyping. But in classrooms, that jump causes problems: wasted materials, unfocused builds, and missed learning opportunities.
Plan asks students to slow down and think before they make. This isn’t bureaucracy—it’s pedagogy. When students articulate their plan, they reveal their thinking. Teachers can assess understanding, catch misconceptions, and guide revision before resources are spent on building.
What students do:
- Select their strongest idea and justify the choice
- Create a detailed sketch, blueprint, or diagram
- List required materials and steps
- Explain how their solution addresses the Design Brief
- Anticipate challenges and plan for them
- Pitch their plan to peers or teacher for feedback
Student outputs: Detailed sketch or blueprint, materials list, written or verbal rationale (why this solution?), plan for construction, pitch or proposal
Teacher planning question: “How will I know students have thought through their solution before they start building?”
Stage 4: Prototype
Students build something real, test it, and learn from what happens. But Prototype is not just construction—it includes testing with real audiences and reflecting on what worked and what didn’t. The goal is not a perfect product; it’s a prototype that teaches.
What students do:
- Construct their prototype following their plan
- Adapt when reality doesn’t match the plan
- Test their prototype with intended users or audience
- Gather feedback systematically
- Document what worked and what needs revision
- Reflect on the process and identify next steps
Student outputs: A working prototype (even if imperfect), documentation of the build process, feedback from testing (organized and analyzed), reflection on successes and failures, action plan for revision (if cycling again)
Teacher planning question: “What can students build and test quickly enough to learn from?”
The Design Brief: Your Project’s North Star
At the center of every CDC project sits the Design Brief—a document that defines the problem, challenge, or opportunity students will address.
The Design Brief is not a fifth stage. It’s the anchor that gives the cycle direction. Teachers create the Design Brief before the project begins, during unit planning. It’s introduced to students at the start of Investigate and referenced throughout—especially during Plan, when students must justify how their solution addresses the brief.
A strong Design Brief includes:
- A clear problem statement
- Context and background information
- Constraints (time, materials, requirements)
- Target audience or stakeholders
- Essential questions to guide inquiry
- Criteria for success
Why it matters: The Design Brief prevents “random making.” Students learn that creative freedom operates within constraints—just as it does in professional design.
The Cycle Continues: Learning Through Iteration
After Prototype, students return to Investigate—but the nature of investigation changes. In the first cycle, students investigate the problem. In subsequent cycles, they investigate how to improve their solution.
| Stage | Cycle 1 | Cycle 2+ |
|---|---|---|
| Investigate | Research the problem through inquiry and empathy | Research what’s needed to improve—user feedback, troubleshooting, or new skills for the next phase |
| Ideate | Generate initial solution ideas | Generate refinements and alternatives based on feedback |
| Plan | Plan your first prototype | Plan your revision |
| Prototype | Build and test version 1 | Build and test version 2 |
A project with two complete cycles teaches more than a project with one polished cycle. Learning lives in the iteration, not the final product.
Flexible Enough for Any Schedule
CDC works across multiple timeframes, from a single class period to a month-long unit:
| Format | Duration | Best For |
|---|---|---|
| Quick Experience | 45–90 minutes | Introduction to the framework; experiencing all four stages |
| Single-Stage Focus | 20–45 minutes | Deep practice with specific tools and techniques |
| Multi-Day Project | 3–10 class periods | Complete projects with time for iteration |
| Extended Unit | 2–4 weeks | Comprehensive units with standards integration |
Even in a 45-minute quick experience, all four stages should be present—just compressed. Students should leave having investigated a problem, generated ideas, articulated a plan, and made something (even if rough).
Summary: The Four Stages at a Glance
| Stage | Purpose | Student Outputs | Teacher Planning Question |
|---|---|---|---|
| Investigate | Research the problem | Problem statement, stakeholder insights, key questions | How will students investigate this before solving it? |
| Ideate | Generate many possibilities | Many sketched ideas, “how might we” questions | Where am I making space for questions, not just answers? |
| Plan | Articulate before building | Blueprint, materials list, rationale, pitch | How will I know they’ve thought it through? |
| Prototype | Build, test, and learn | Prototype, feedback documentation, reflection | What can they build and test quickly enough to learn? |
What Makes This Framework Unique
Most design frameworks say “bias toward action”—jump from ideas to building. That works for professionals with cheap materials and fast iteration. But in classrooms, rushing to build leads to wasted materials, unfocused prototypes, and missed learning.
CDC adds the Plan stage: students articulate and justify their solution before they build. When students explain their thinking, teachers can assess understanding and catch misconceptions before resources are spent. It’s not bureaucracy—it’s where learning becomes visible.
Ready to Try It?
Get the Free Lesson Kit—a scripted 45-minute lesson that walks you and your students through all four stages.